

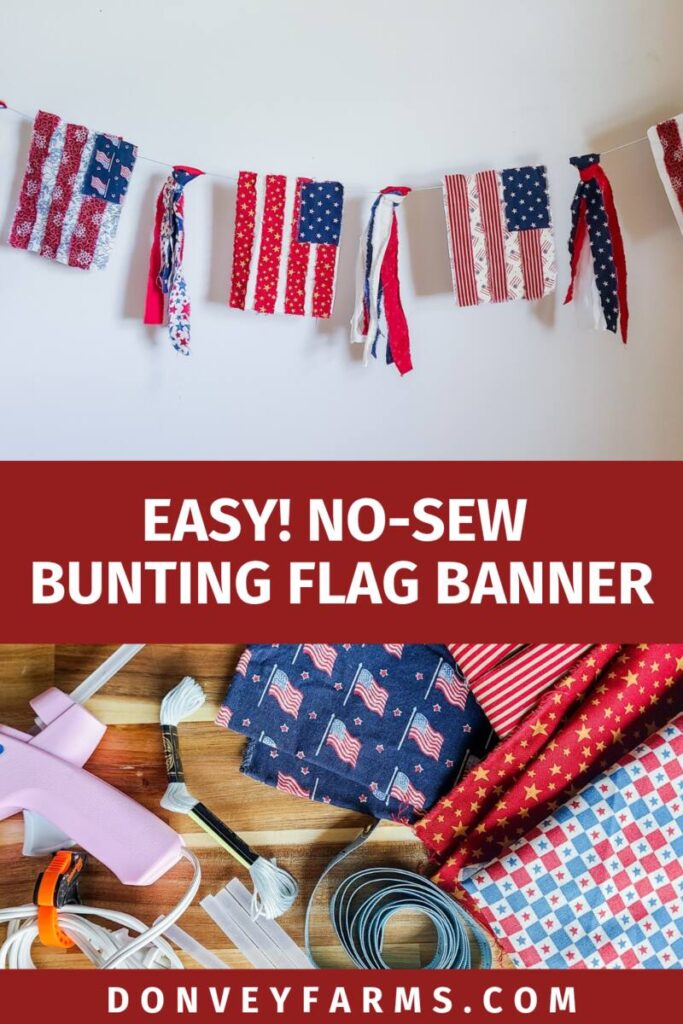
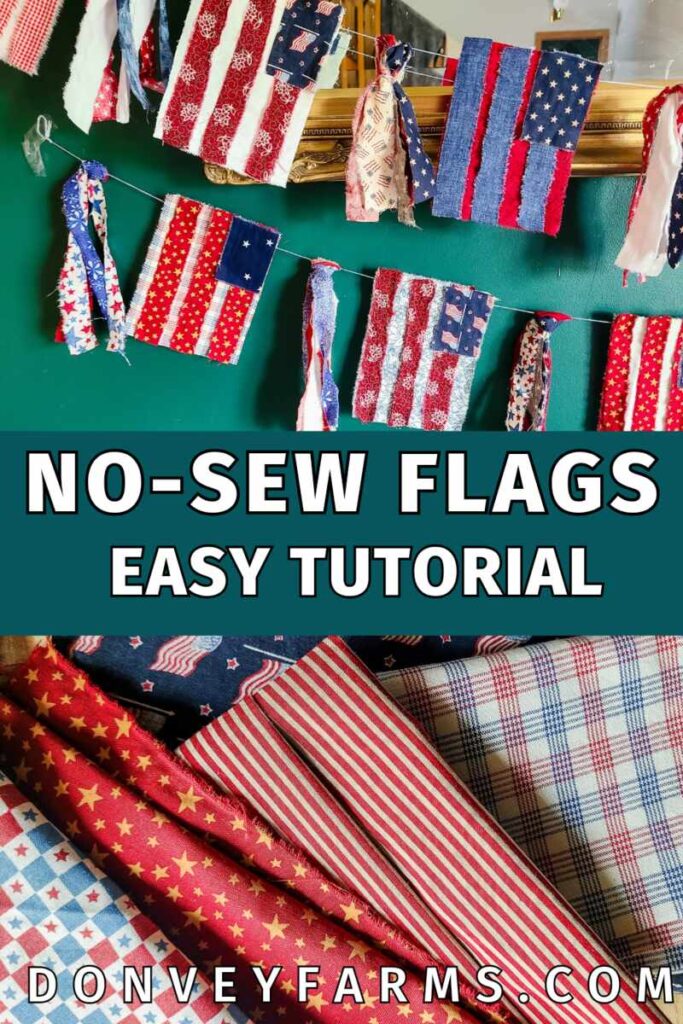
How To Make A No-Sew Bunting Flag Banner
If you’re looking for simple, beautiful, eco-friendly, and affordable patriotic decor for this 4th of July, look no further! This bunting flag banner is as easy as DIY can get, and so affordable too! Made from just a few simple materials, this project is one you can do today, without needing to buy anything new. Let’s walk through how to make a no-sew fabric bunting flag banner together!
This post contains affiliate links, which means I make a small commission at no extra cost to you. Please read my full disclosure policy here.
I am naturally a decorator. For each new season I have a different set of vintage pyrex dishes to display and holiday decor to bring out. What I do not like about holiday decor is that it is usually cheaply made, expensive, and not unique. I love decorating my home with pieces that bring a personal touch. This rustic bunting flag banner brings a vintage feel, and homey touch to any space. It is so simple to make and personalize, make it your own!
What Is A Bunting Flag:
A bunting flag, or flag bunting is a decoration or banner, usually with patriotic designs and colors like an American flag. It is often made from fabric or paper and can be draped, pleated, or sewn together. They are used as festive decorations for holidays and special events.
Why You’ll Love Making This Bunting Flag Banner:
Easy to make: Since there’s no sewing required, this DIY project easy enough for even young kids to join in. It’s so simple to get the materials together, and have a beautiful banner made quickly.
Affordable: You don’t need any special materials for this craft making it very affordable. You can use old scraps for the fabric, ask friends for some or even thrift it very affordably.
Eco-Friendly: Carefully store and re-use this bunting flag banners for years to come! No more waste and cheap paper and plastic decor. Just adorable fabric flags!
No-Sew! By using just hot glue, this project is a breeze to throw together, no special talent required!
Customizable: Let your imagination soar with this fun project! There are endless options of fabric prints to arrange into a beautiful collage of fabric flags. Adding lace as the stripes or buttons for a fun touch.
What kind of Fabric Do You Need To Make A No-Sew Bunting Flag Banner?
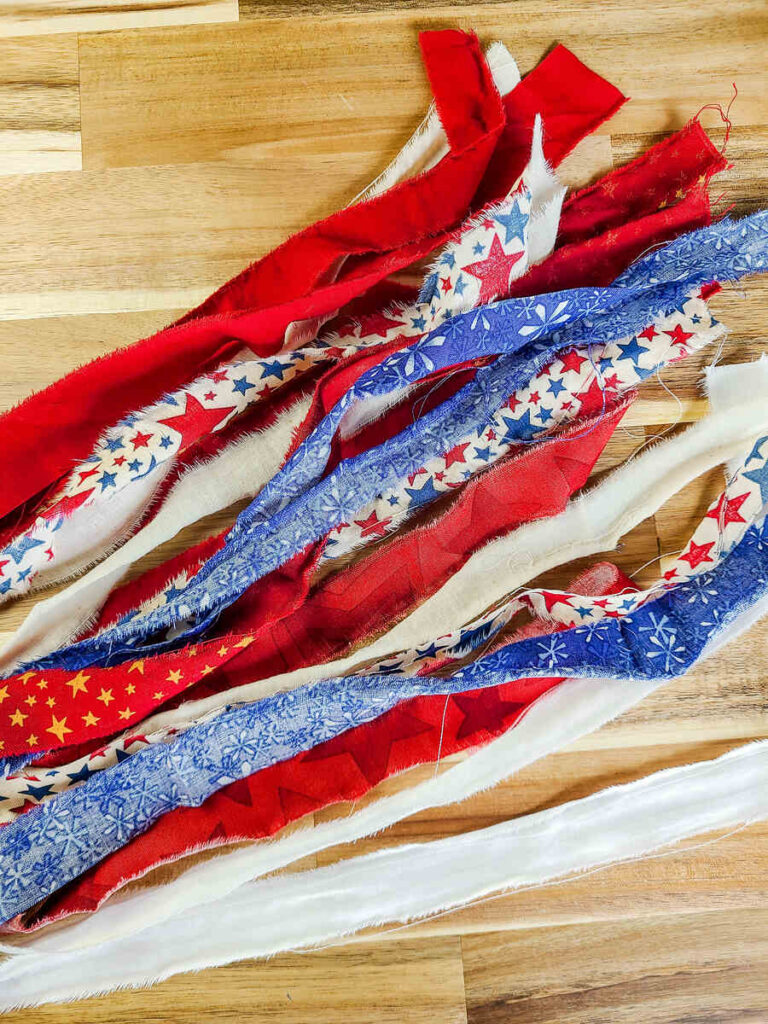
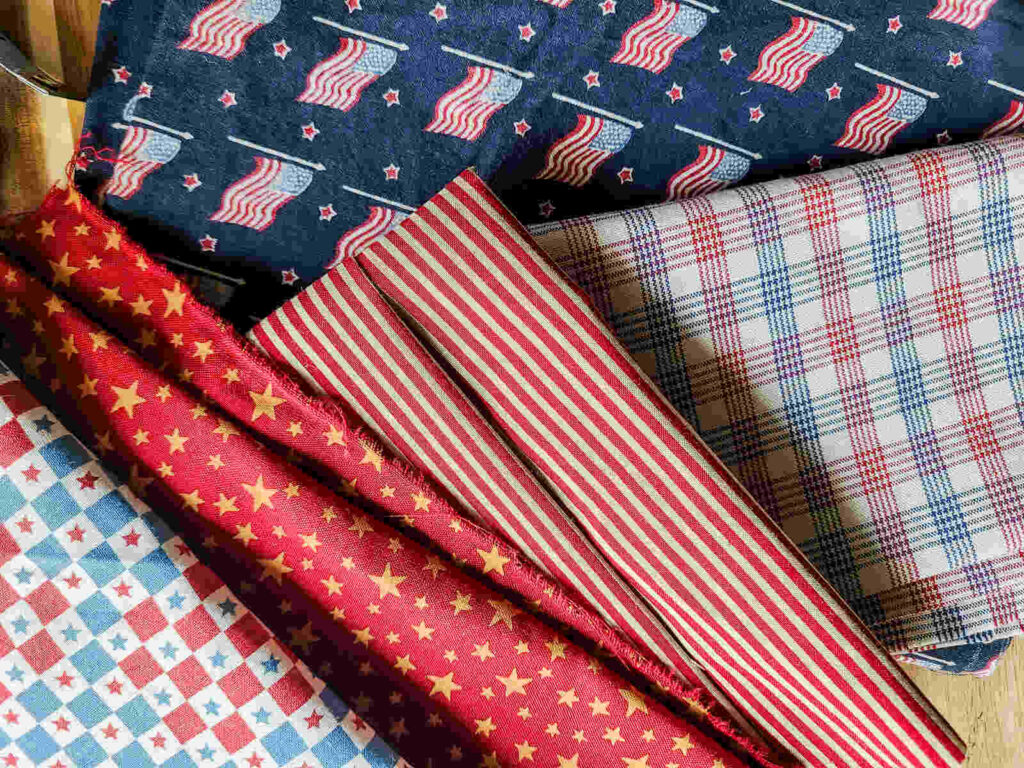
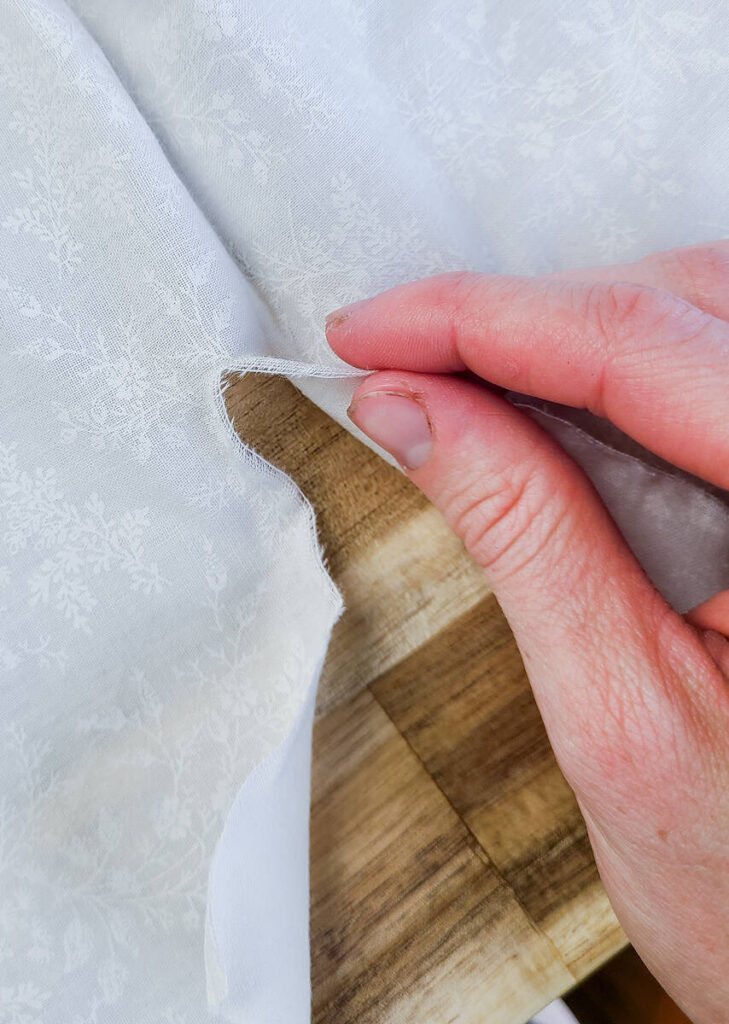
Any cotton fabric will work for this project. As long as it’s a stiff material and not stretchy, it should work fine. Old cotton bed sheets, table cloths, or curtains are an excellent choice to use as material for this project. I like the rustic look and simplicity of ripping the fabric into pieces for the flags, although you can also just cut all of the pieces if you prefer.
How Long Does This Project Take?
How long this project takes depends on the desired length of the banner, and the number of banners you’re making. It should take you approximately one hour to make a 6 flag banner. However, it takes a significantly shorter amount of time to make longer, or a higher quantity of banners because you can cut all of the fabric for the flags at once.
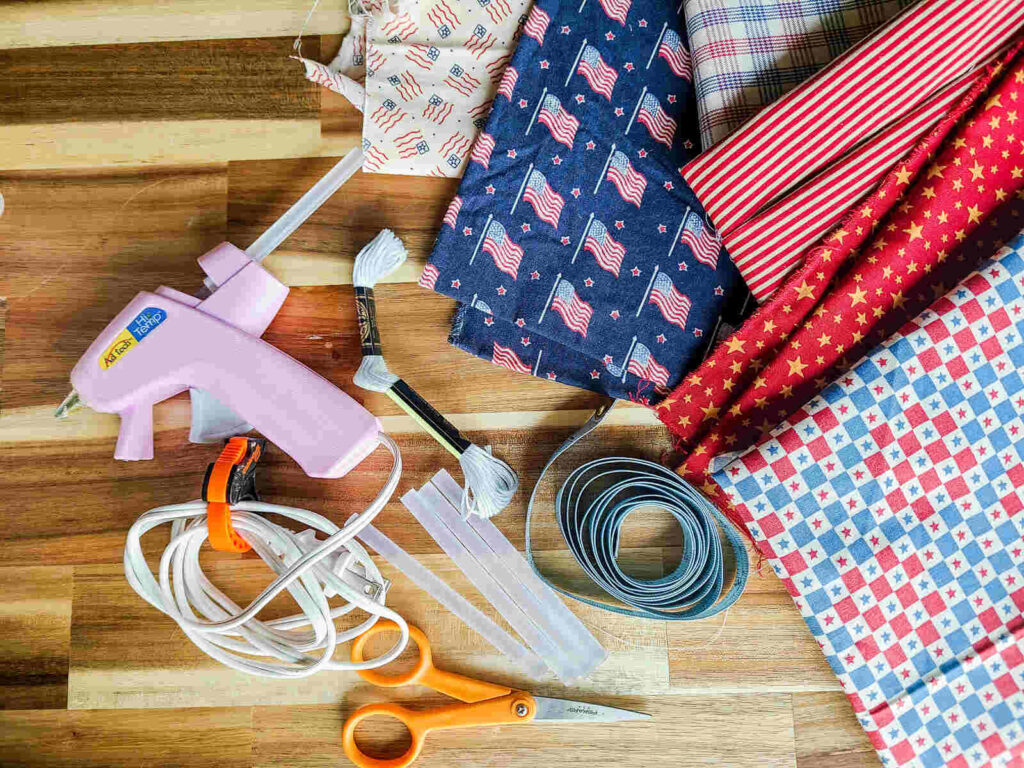
Tools You’ll Need:
Scissors
Measuring tape
Hot glue gun
Materials:
Fabric scraps or pieces
Glue gun glue sticks
Embroidery floss, yarn, or twine
How To Make A No-Sew Bunting Flag Banner:
Collect all tools and materials needed for this project
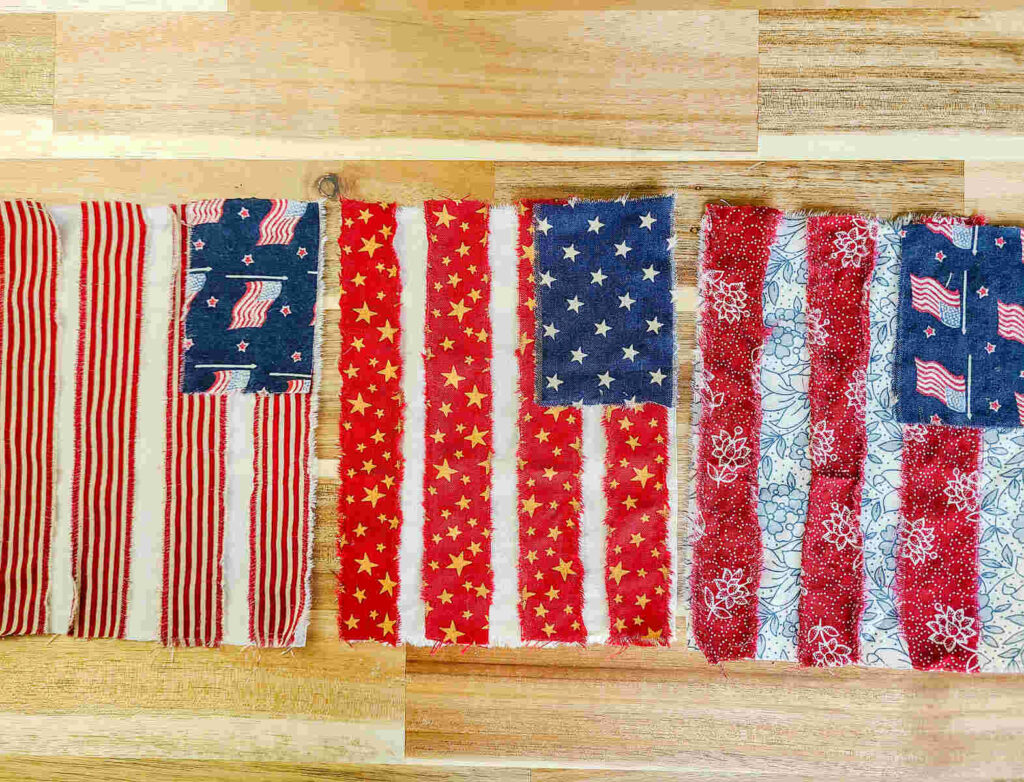
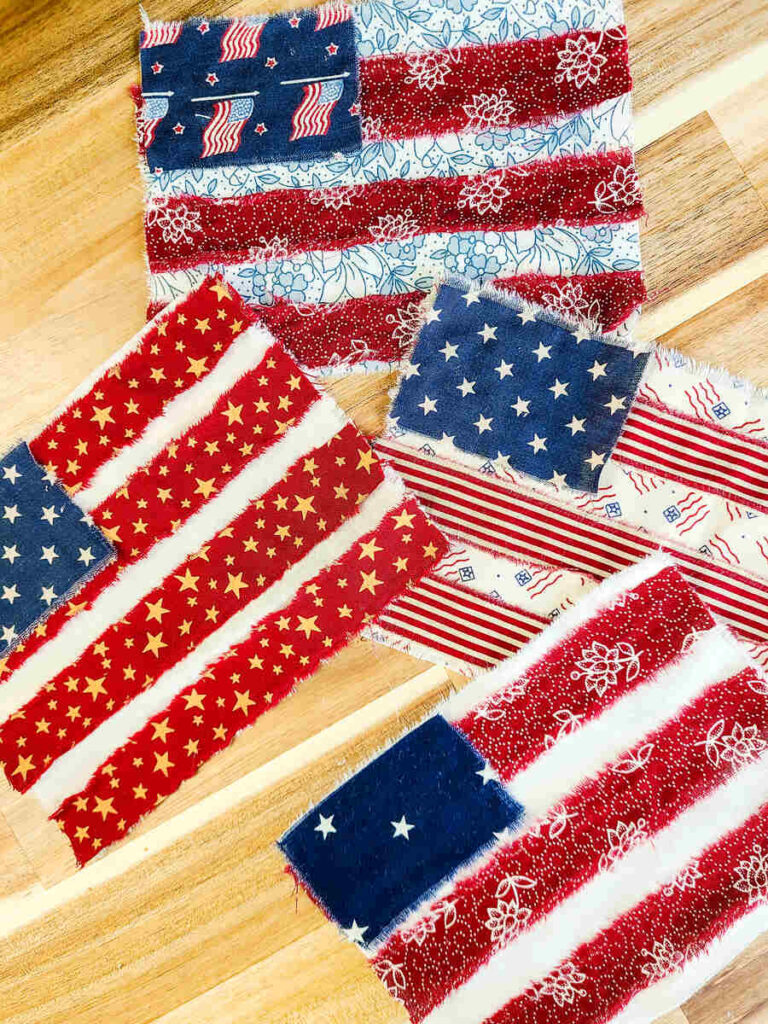
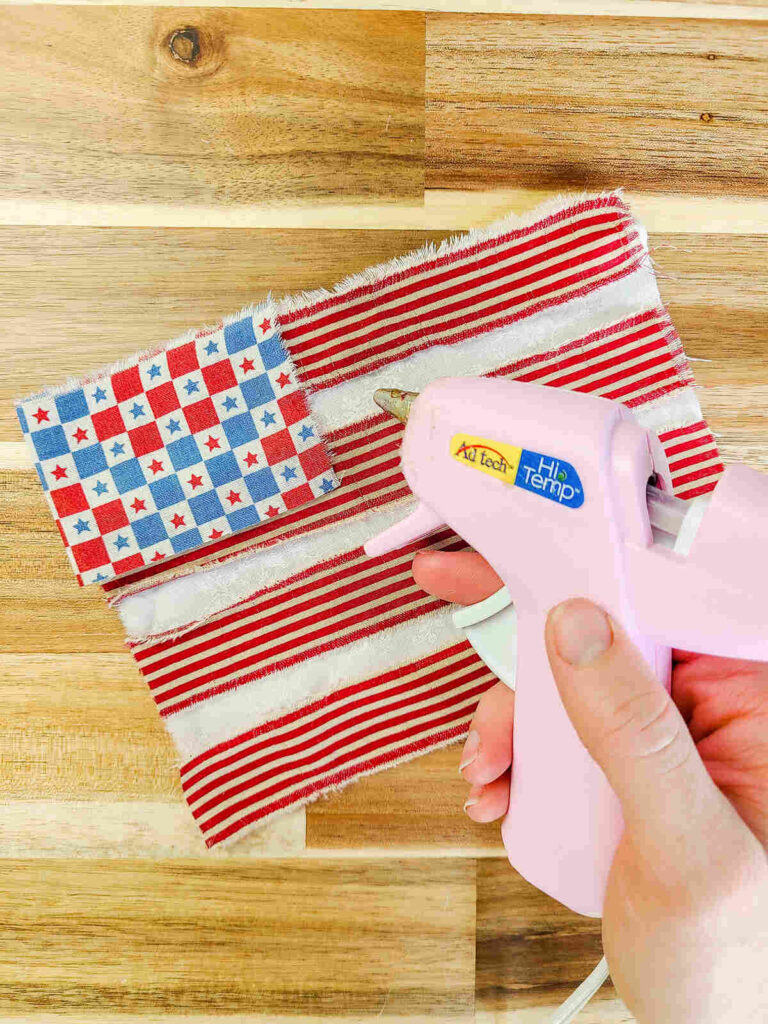
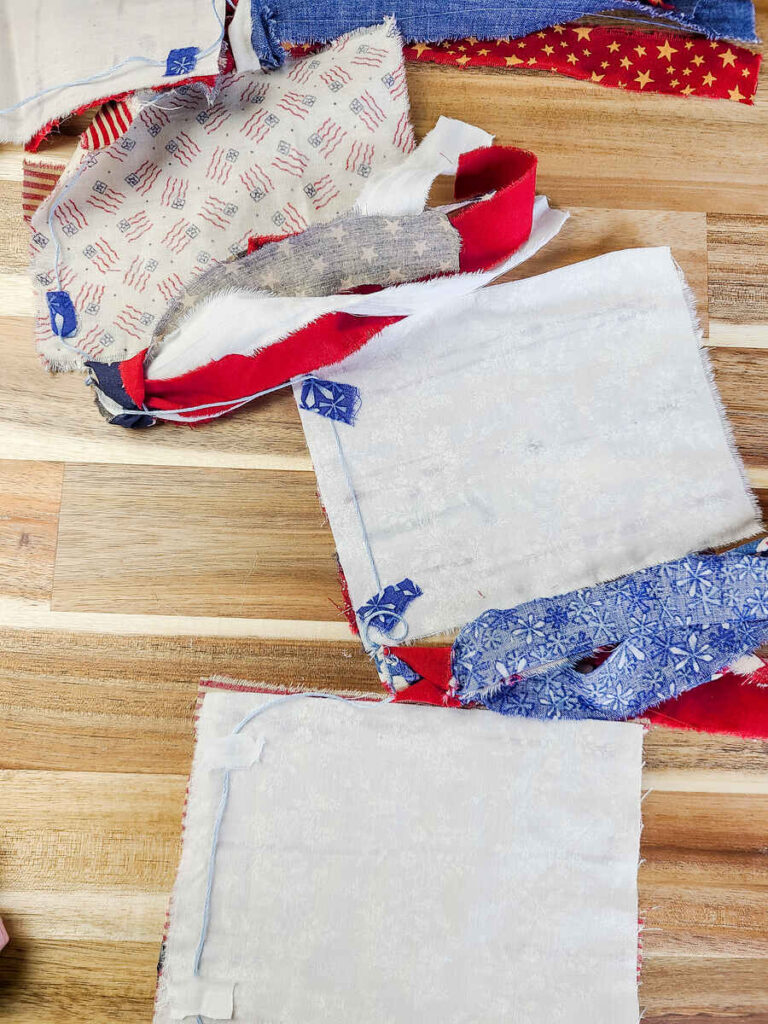
For the flag you’ll need 3 fabric shapes,
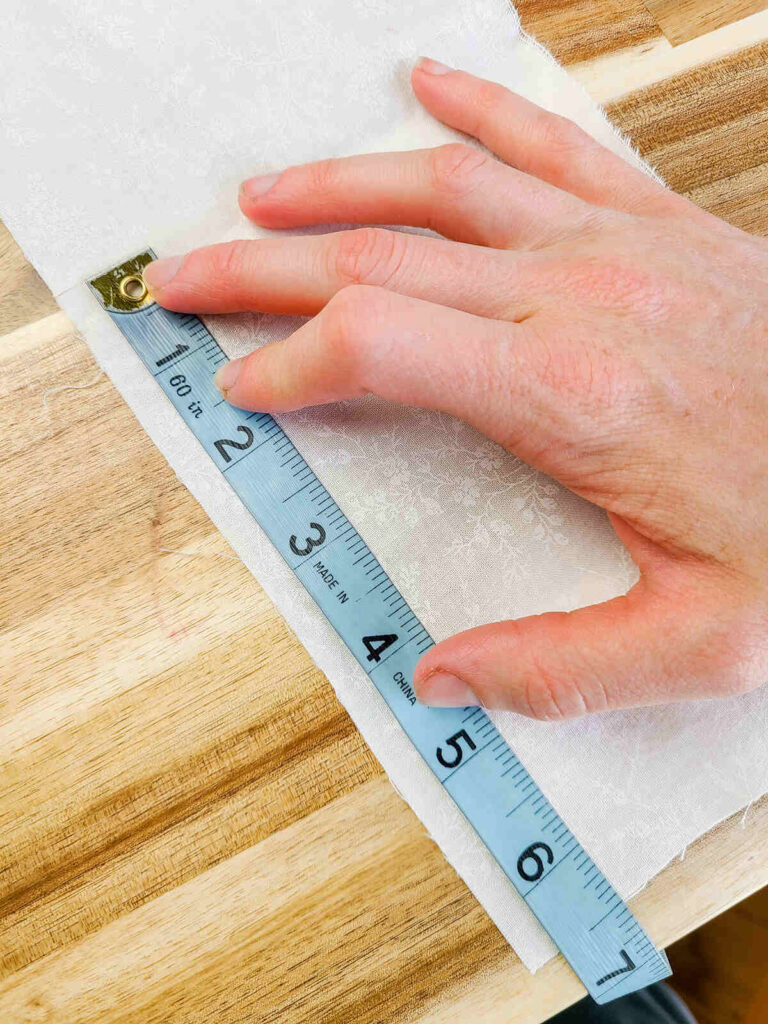
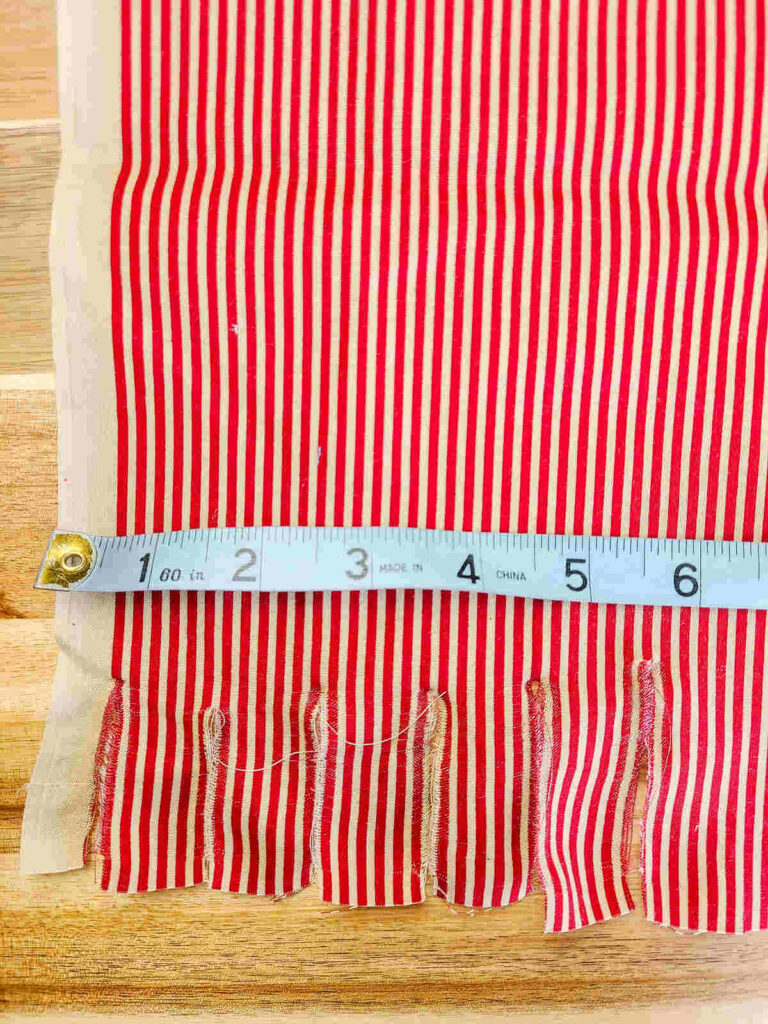
- The base of the flag rectangle (5″ x 6.5″)
- 3 stripes per flag (1″ x 6.5″)
- Small rectangle for the upper left corner (2″ x 3″)
The base of the flag is 5 inches wide, and 6.5 inches long.
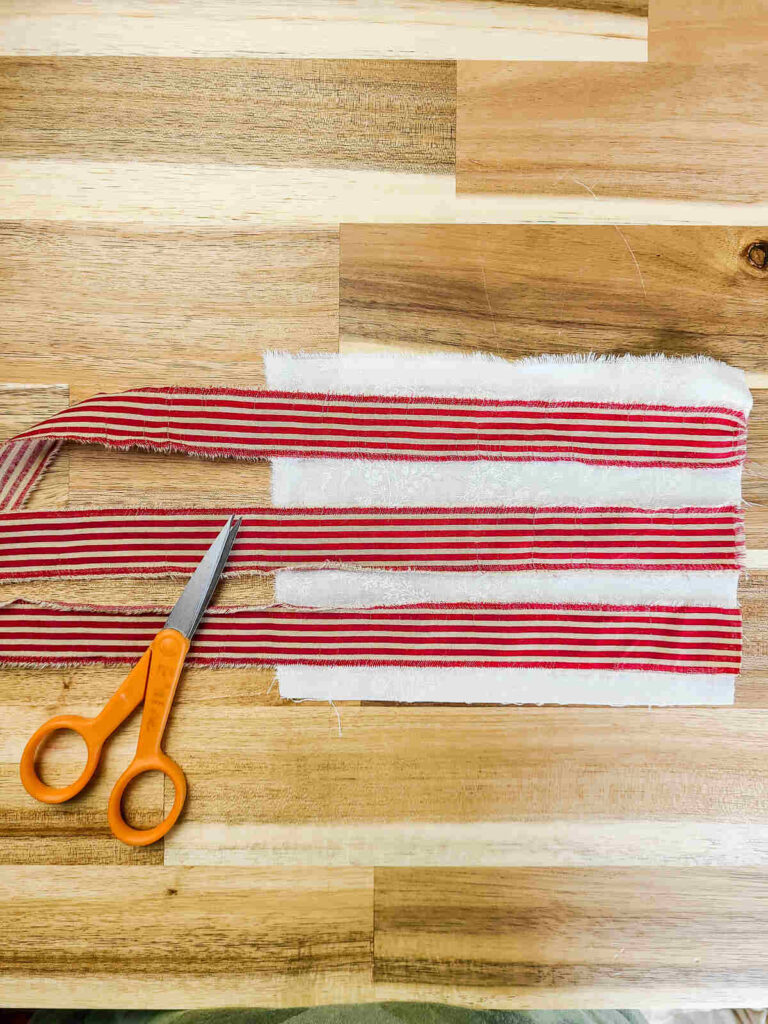
The stripes are 1 inch wide, by 6.5 inches long. This makes 3 stripes fit well per flag. If you want more stripes, make them 1/2 inch thick instead.
The small rectangle is 2 inches wide, by 3 inches long
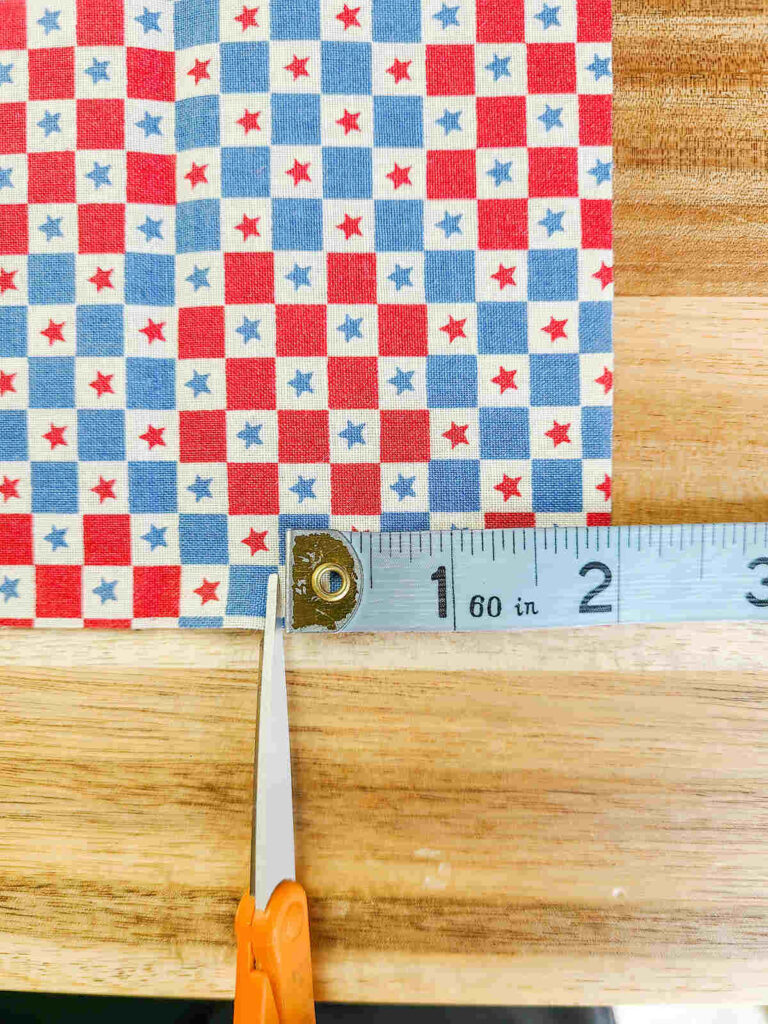
You make these shapes by measuring the desired shape and cutting a 1/4″ slit into the fabric. Next, start ripping the fabric into the desired size. Another option is to just cut the fabric into the pieces but I like the rustic and imperfect look of ripping the material instead. (It’s faster this way too!)
Now have fun with the design by assembling the flag to look how you’d like, then gluing the pieces into place with your hot glue gun.
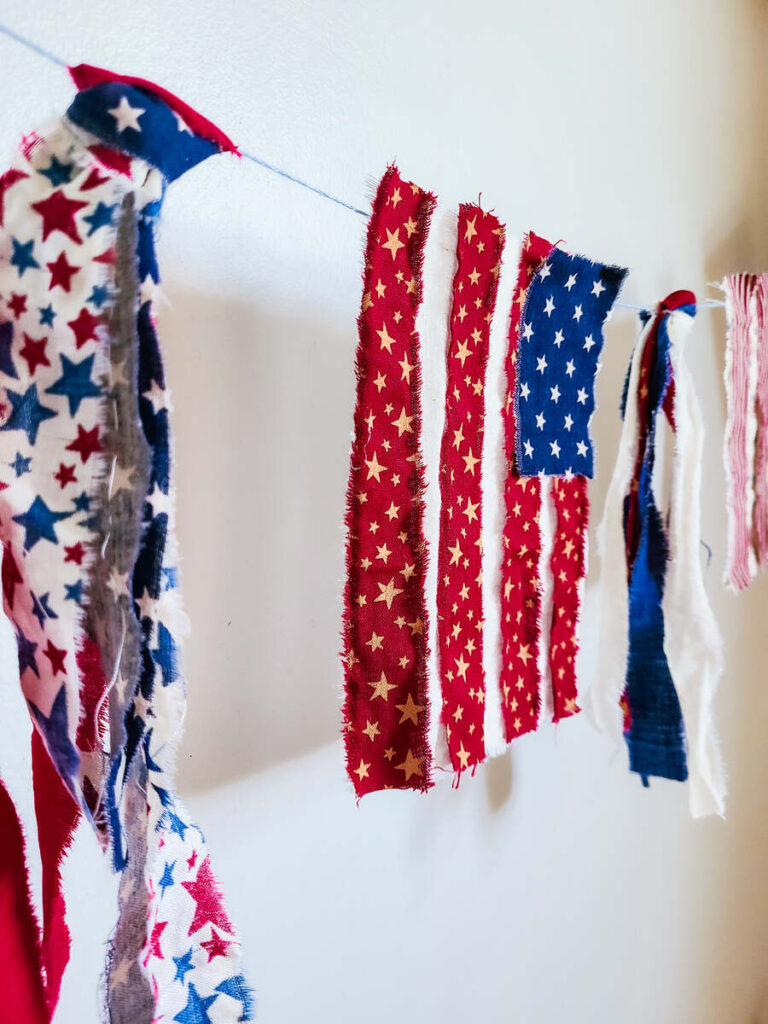
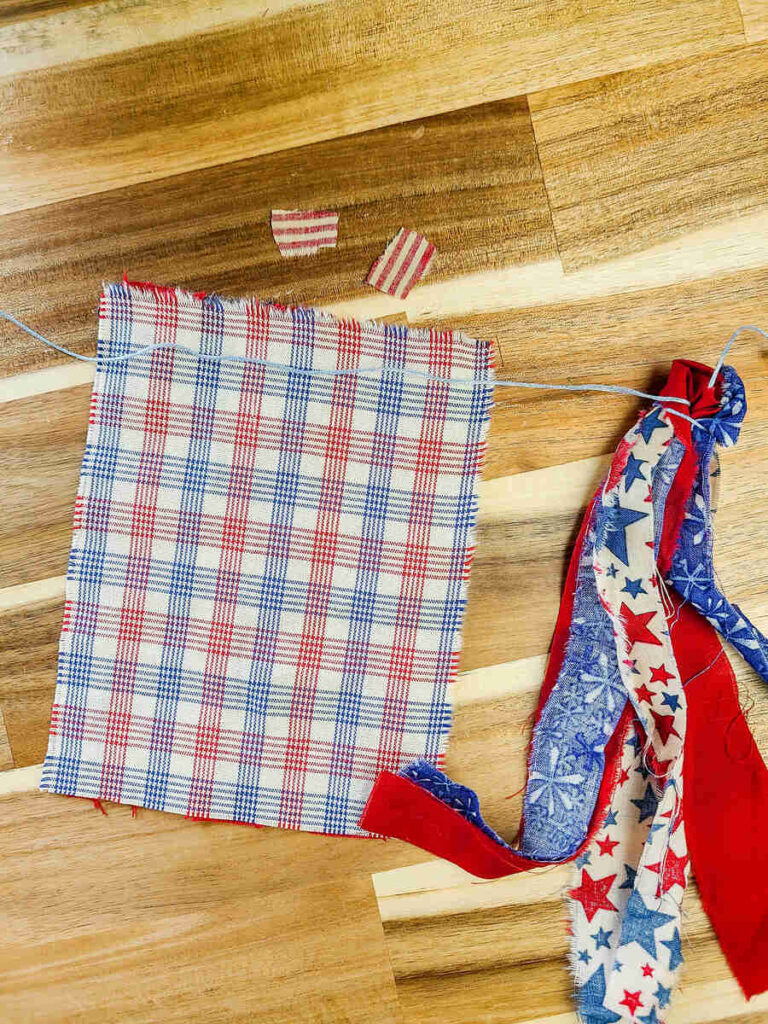
To make the the fabric strips between the flags on the banner, simply follow the the same method of cutting a small slit, then ripping into the desired length. I cut my pieces 1 inch wide, and 14 inches long.
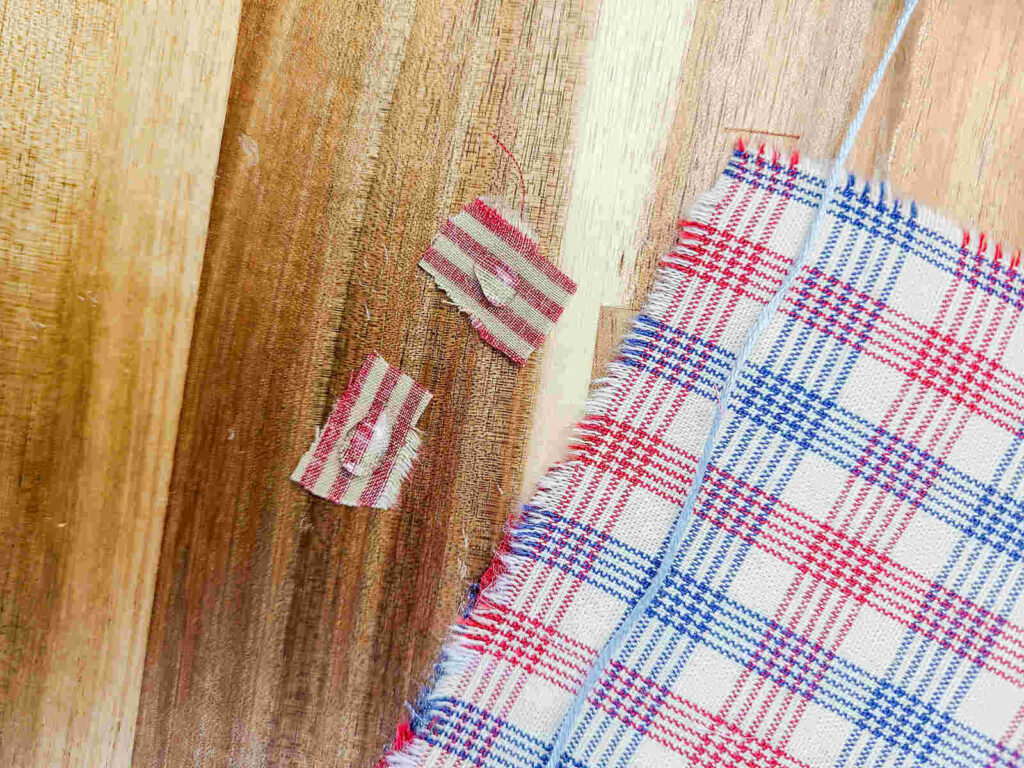
Set aside any tiny fabric pieces to use when gluing the flags onto the banner. This will make the flag more secure when gluing to the banner string.
Once you have all the flags made and fabric strips, cut a piece of string 6ft long.
To assemble the banner, tie off a small loop on one end of the string to make a loop to hang the banner from a nail or hook.
Tie 3 fabric strips onto the string 1 inch away from the loop. I used this simple method to make uniform and cute ties on my banner.
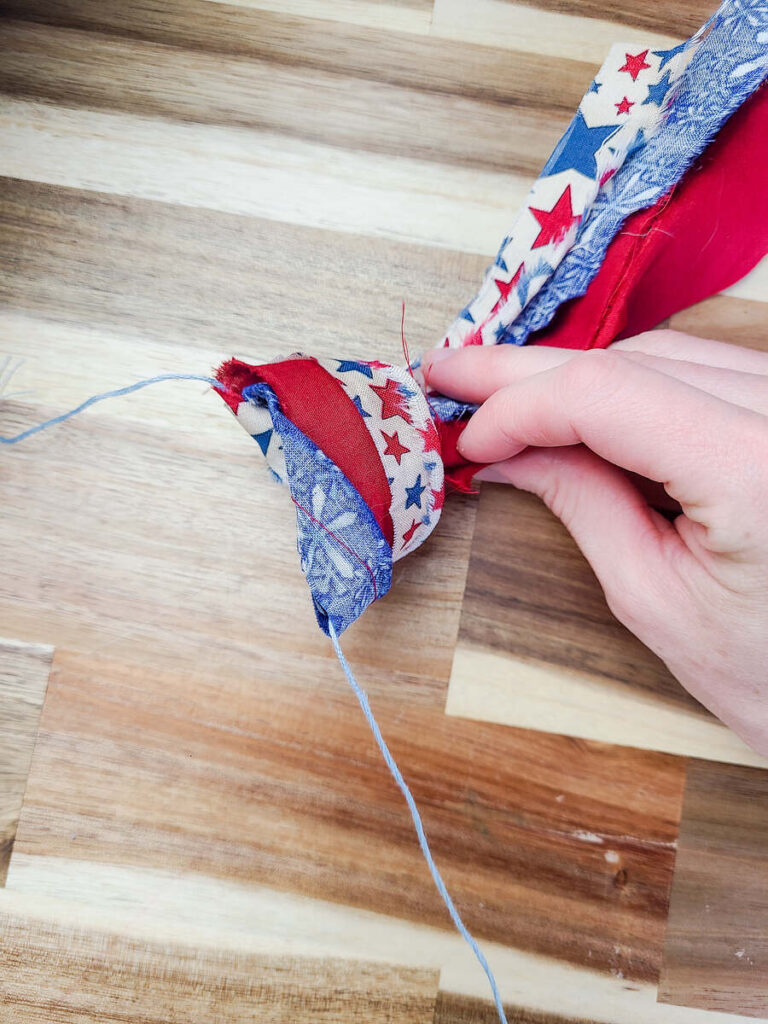
Lay the flag facing away from you, under the string, 2 inches away from the fabric strips.
Apply hot glue to 2 small fabric scraps.
Place the scraps onto the fabric where the string is laid securing the flag to the string.
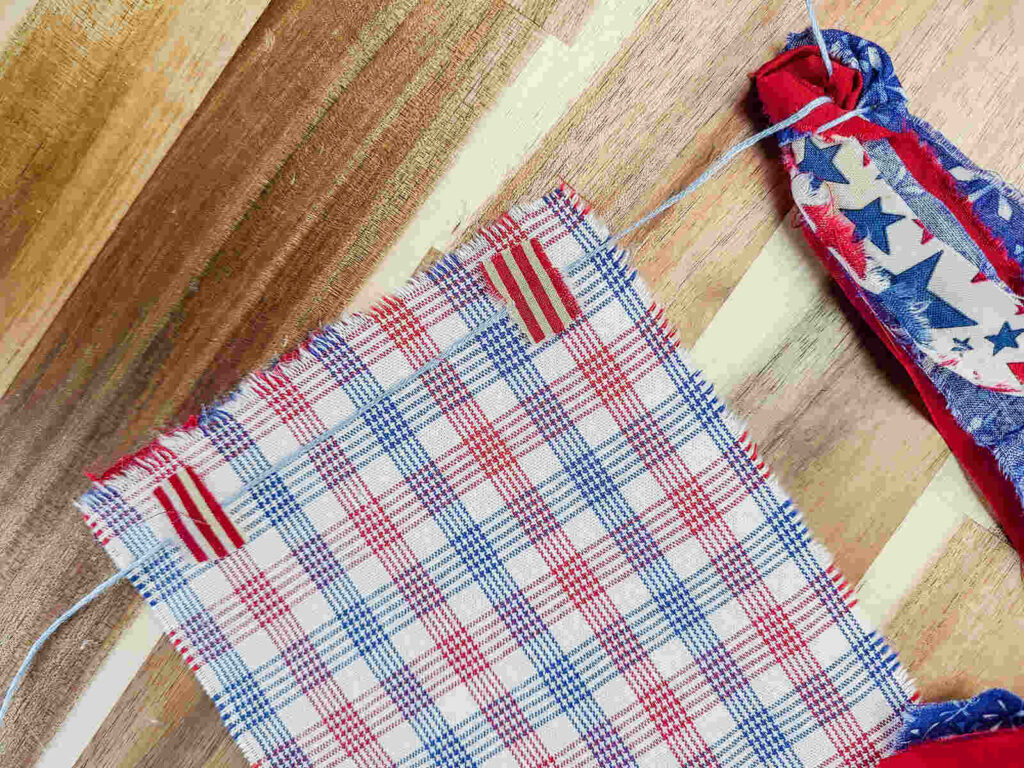
Once the glue has dried, tie 3 more fabric strips on to the string 2 inches away from the flag.
Repeat this process into all of the flags and fabric scraps are on the string.
Tie off the loose end of the string into a loop.
Find a place to display your beautiful bunting flag banner.

How To Make A No-Sew Fabric Bunting Flag Banner
Equipment
- Scissors
- Measuring tape
- Hot glue gun
Materials
- Fabric scraps or pieces
- Glue gun glue sticks
- Embroidery floss yarn, or twine
Instructions
- Collect all tools and materials needed for this project
- For the flag you’ll need 3 fabric shapes,
- The base of the flag rectangle (5″ x 6.5″)
- 3 stripes per flag (1″ x 6.5″)
- Small rectangle for the upper left corner (2″ x 3″)
- The base of the flag is 5 inches wide, and 6.5 inches
- The stripes are 1 inch wide, by 6.5 inches long. This makes 3 stripes fit well per flag. If you want more stripes, make them 1/2 inch thick instead.
- The small rectangle is 2 inches wide, by 3 inches long
- You make these shapes by measuring the desired shape and cutting a 1/4″ slit into the fabric. Then ripping the fabric into the desired size. You can also just cut the fabric into the pieces but I like the rustic and imperfect look of ripping the material instead. (It’s faster this way too!)
- Next you play around the design by assembling the flag to look how you’d like, then gluing the pieces into place with your hot glue gun.
- For the fabric strips between the flags on the banner, you do the same method of cutting a small slit, then ripping into the desired length. I cut my pieces 1 inch wide, and 14 inches long.
- Set aside any tiny fabric pieces to use when gluing the flags onto the banner. This will make the flag more secure when gluing to the banner string.
- Once you have all the flags made and fabric strips, cut a piece of string 6ft long.
- To assemble the banner, tie off a small loop on one end of the string to make a loop to hang the banner from a nail or hook.
- Tie 3 fabric strips onto the string 1 inch away from the loop. I used this simple method to make uniform and cute ties on my banner.
- Lay the flag facing away from you, under the string, 2 inches away from the fabric strips.
- Apply hot glue to 2 small fabric scraps.
- Place the scraps onto the fabric where the string is laid securing the flag to the string.
- Once the glue has dried, tie 3 more fabric strips on to the string 2 inches away from the flag.
- Repeat this process into all of the flags and fabric scraps are on the string.
- Tie off the loose end of the string into a loop.
- Find a place to display your beautiful bunting flag banner.
Notes
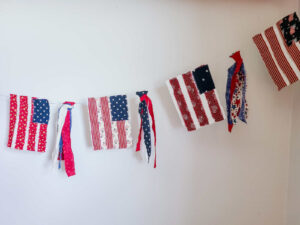
Have You Made A Bunting Flag Banner?
Let me know in the comments below!
Want to know more about me? Find my story here:
This post contains affiliate links, which means I make a small commission at no extra cost to you. Please read my full disclosure policy here.


This is so festive and darling! Love how simple the instructions are to follow.
What a great idea to use a hot glue gun for bunting! I think I’ll give it a go with our kids! Thank you 🙂
This “no sew” banner is my jam! TOTALLY rocking this out!🤩
Adorable!! So cute and perfect for little helping hands