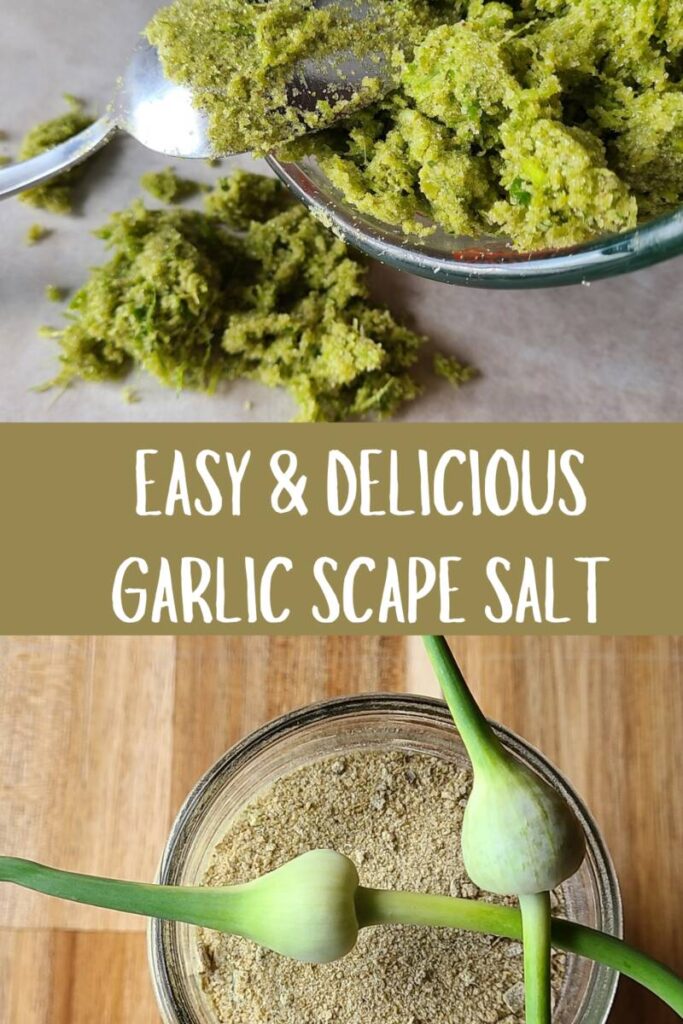
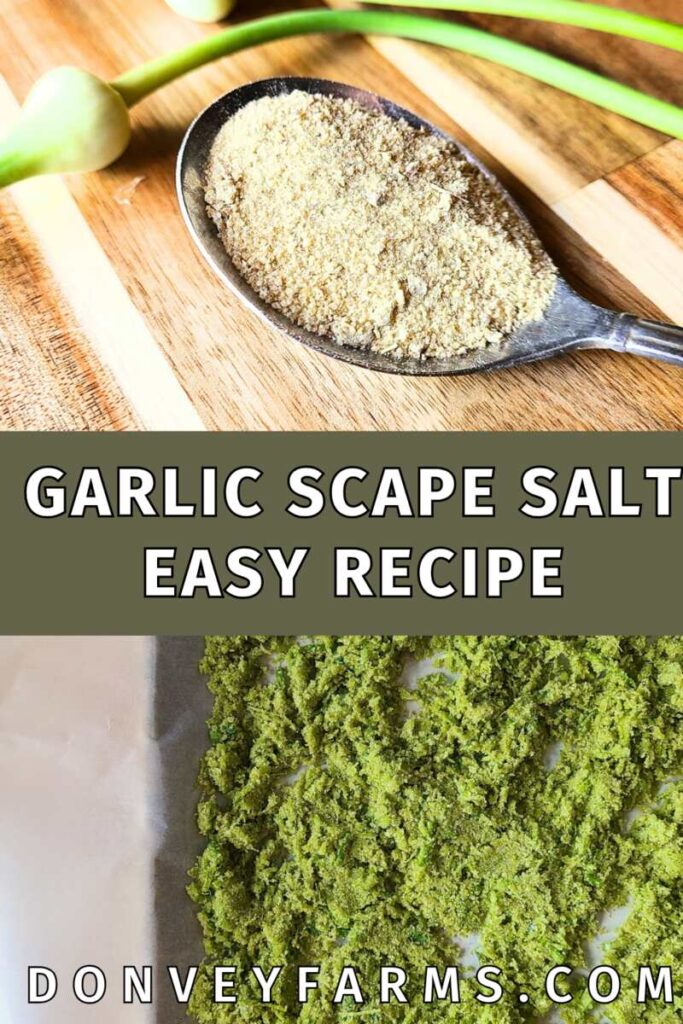
How To Make Garlic Scape Salt Simple Recipe
I love to use as many parts of a plant as possible. Whether that’s for skincare, home remedies or delicious recipes, I don’t like anything to go to waste! ( example: my Strawberry Top Simple Syrup Recipe) In this post I show you how to make garlic scape salt. This simple recipe is an excellent way to use this unique part of the garlic plant, and enjoy it all year round!
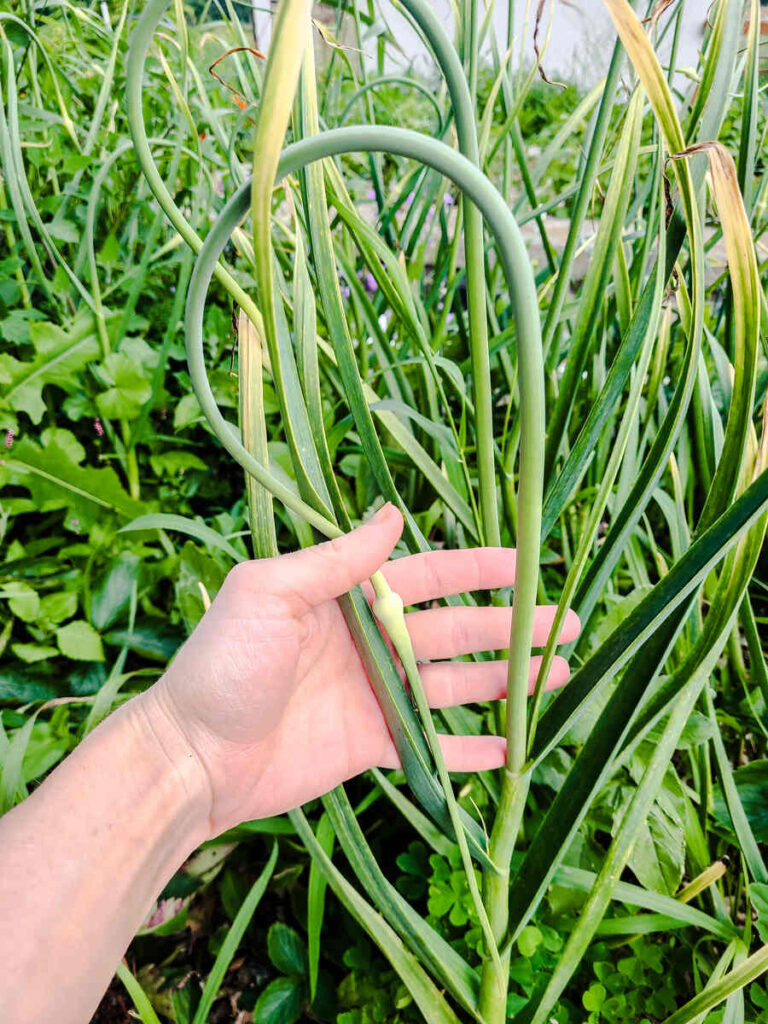
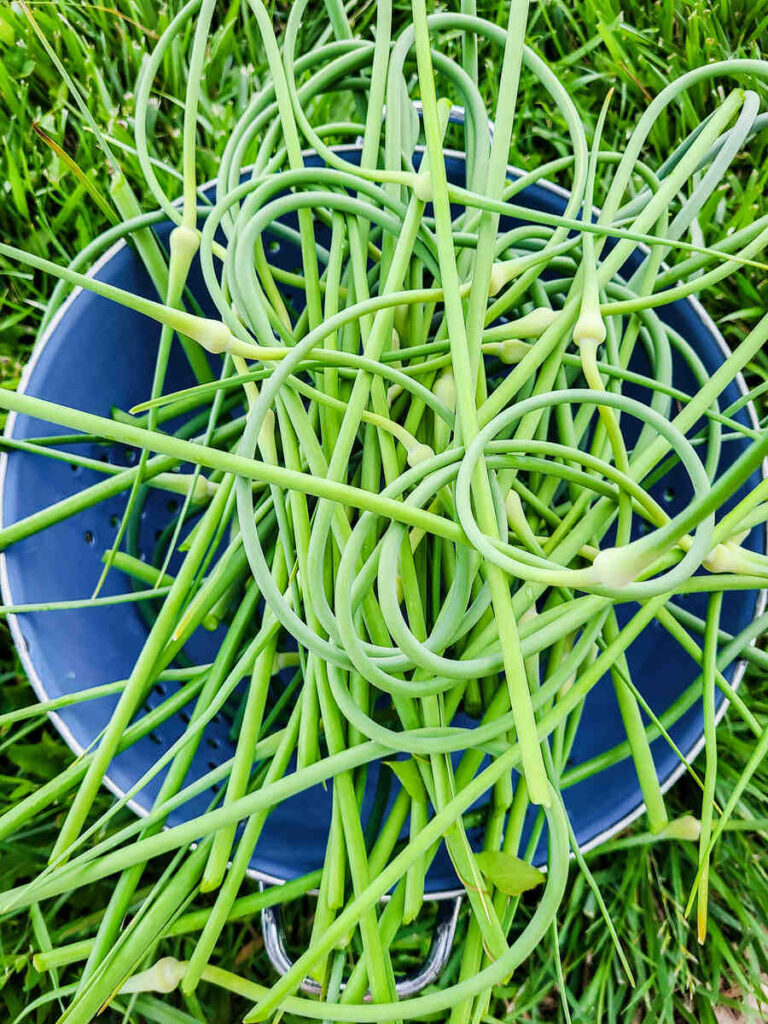
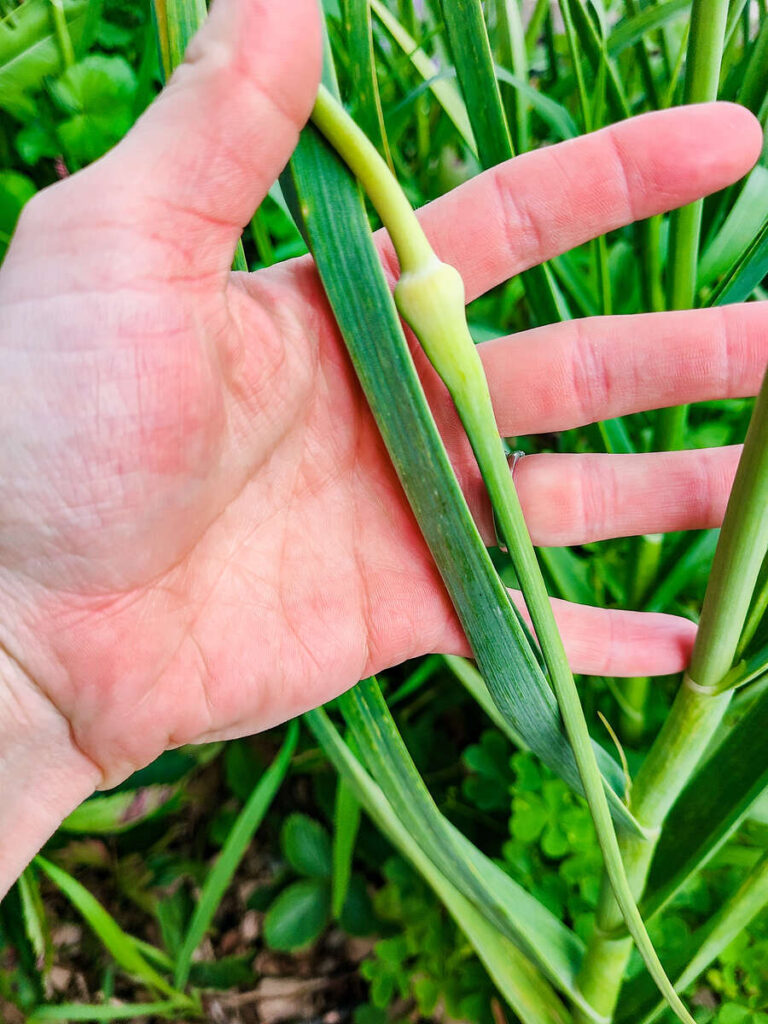
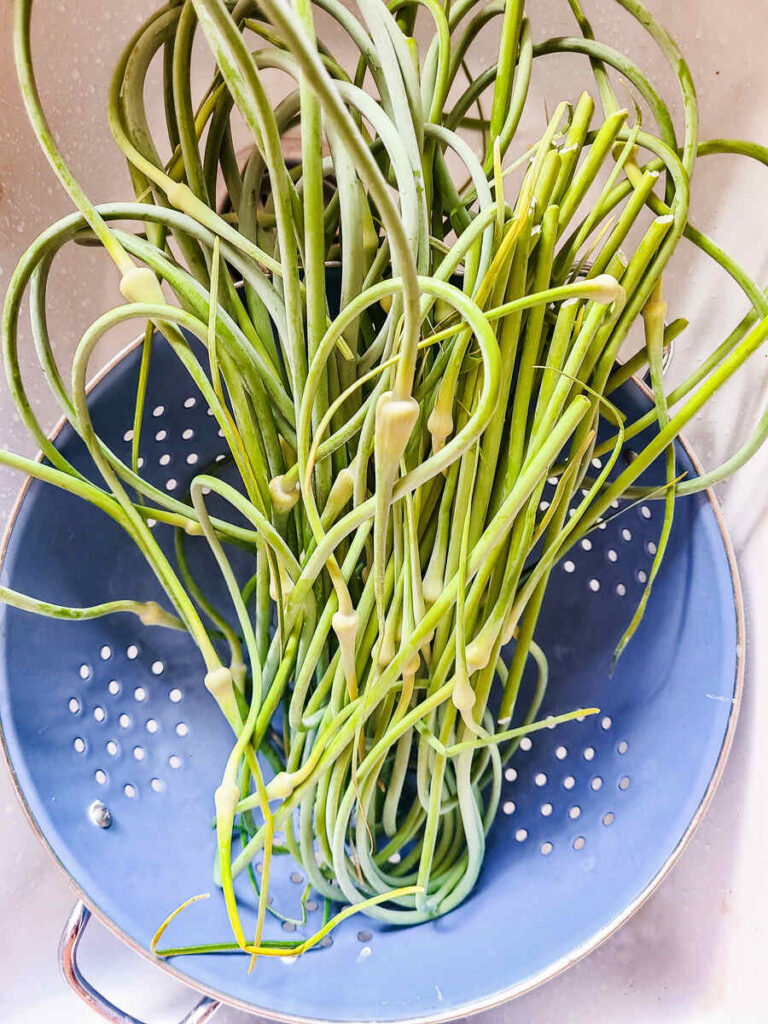
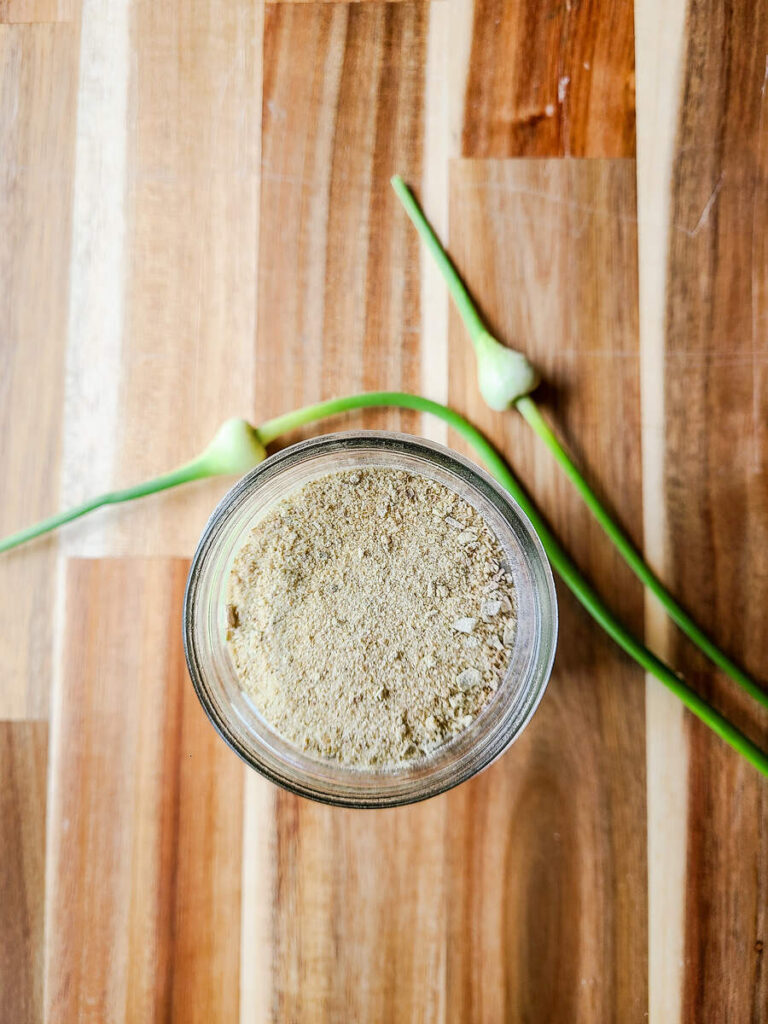
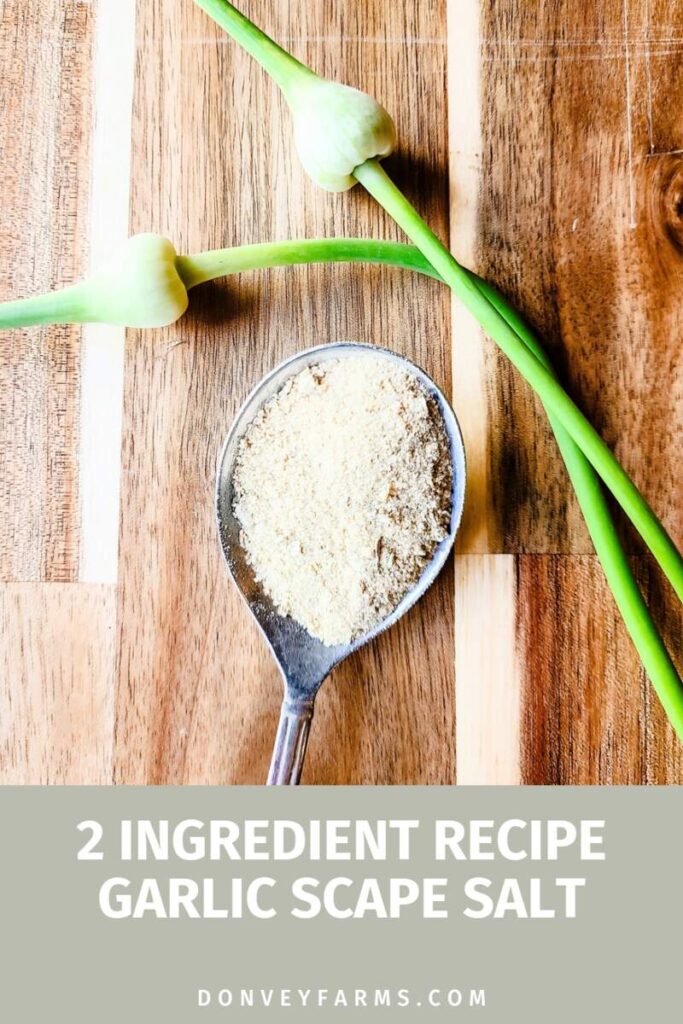
A garlic scape is a curly green blossom stem with a flower that develops on the end of it. Scapes grow directly from hard neck garlic plants in the late spring or early summer. Usually, gardeners cut the scapes to encourage the garlic plant to grow a larger garlic bulb. The scape doesn’t need to be thrown away though. It tastes and smells just like garlic and can be used in multiple different ways.
This post contains affiliate links, which means I make a small commission at no extra cost to you. Please read my full disclosure policy here.
What does Garlic Scape Salt Taste Like?
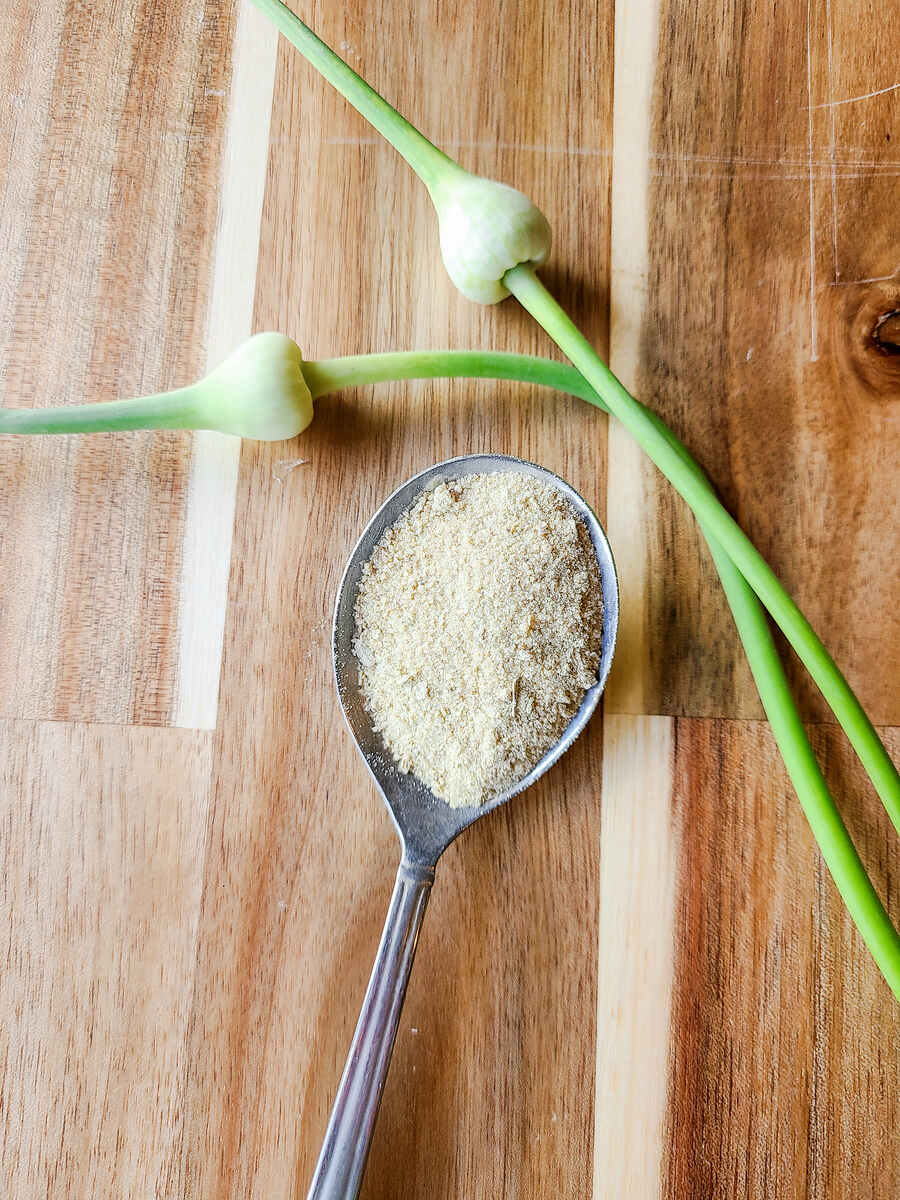
Garlic scape salt tastes just like traditional garlic salt. The main difference is that it has a slightly green hue to it due to the color of the garlic scapes themselves.
Is Garlic Scape Salt Difficult To Make?
Absolutely not! This recipe is very fast, simple and uses just 2 ingredients! I make this salt every year for our family to enjoy, and the extra I sell in our road side farm stand. Our customers love it!
Where can I Get Garlic Scapes:
If you don’t grow hard neck garlic at your own, you may be able to find garlic scapes at specialty food stores, or local farmers markets in the late spring/early summer season.
How and When To Harvest Garden Scapes From Your Own Garden:
If you planted your own hard neck garlic in the fall, by late May/early June your garlic scapes will be budding and ready to cut.
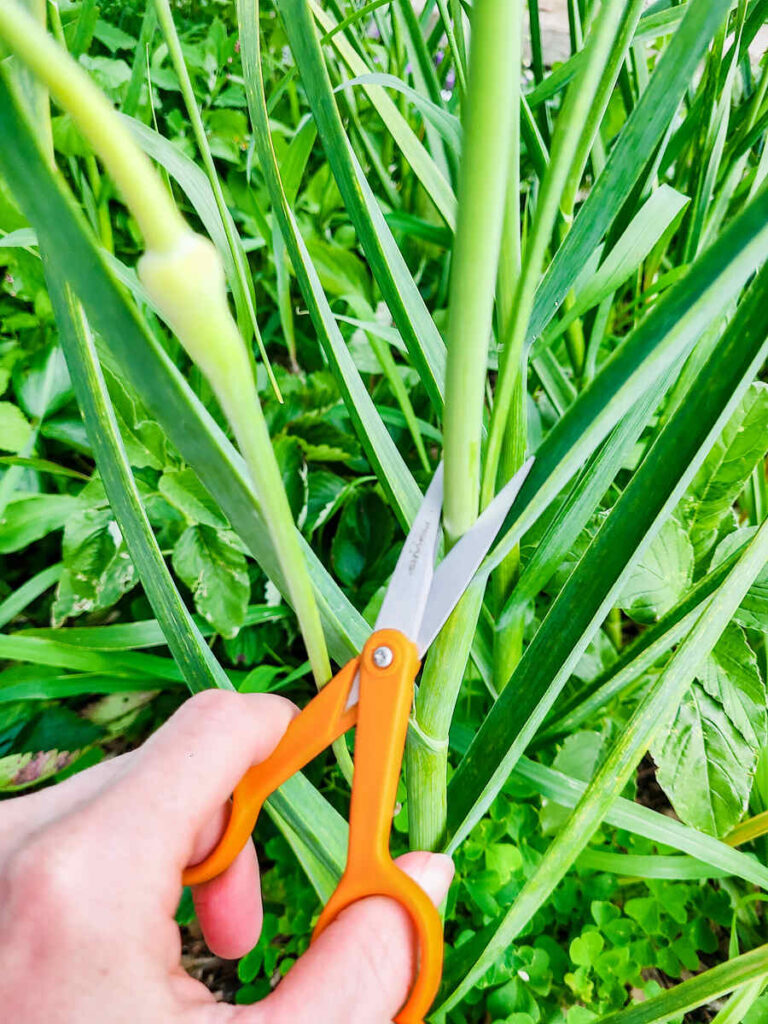
You want to cut the garlic scapes when they’re between 6-8 inches long. If you wait too long, it takes too much of your garlic plants energy to grow the scape, and your scape stem may be too hard to use.
How to cut your garlic scapes: Cut using a small knife or scissors near where the garlic plant and base of the garlic scape meet.
Why You’ll Love This Recipe:
- No Waste: This recipe uses a part of the garlic plant that most people just throw away. This recipe gives the garlic scapes a chance to shine and be enjoyed all year!
- Simple: I love how easy this salt is to make! With minimal equipment, just a few ingredients, and a little time, you’ll have fresh garlic scape salt in a jiffy.
- Great Gift: This recipe makes an excellent gift for friends and family or product to sell at a farmers market, farm stand, or vendor fair.
- Stores Well: Something great about this recipe is how well it stores. Salt has almost an infinite shelf life. If properly dried, this garlic scape salt will have a very long shelf life as well and is easy to store for dry storage.
- Can be customized: If you’d like to play with different ingredients and spices to make your own unique salt flavor, go for it! Just include the extra ingredients after the salt has been thoroughly mixed with the garlic scapes before baking.
Tips for Making Garlic Scape Salt:
Do you need a food processor/blender? Yes. You absolutely need something to pulse the garlic scapes into the salt. A food processor works more smoothly for this recipe than a blender does, a blender requires slowly adding the salt and doing several small batches so all of the scapes get pulverized.
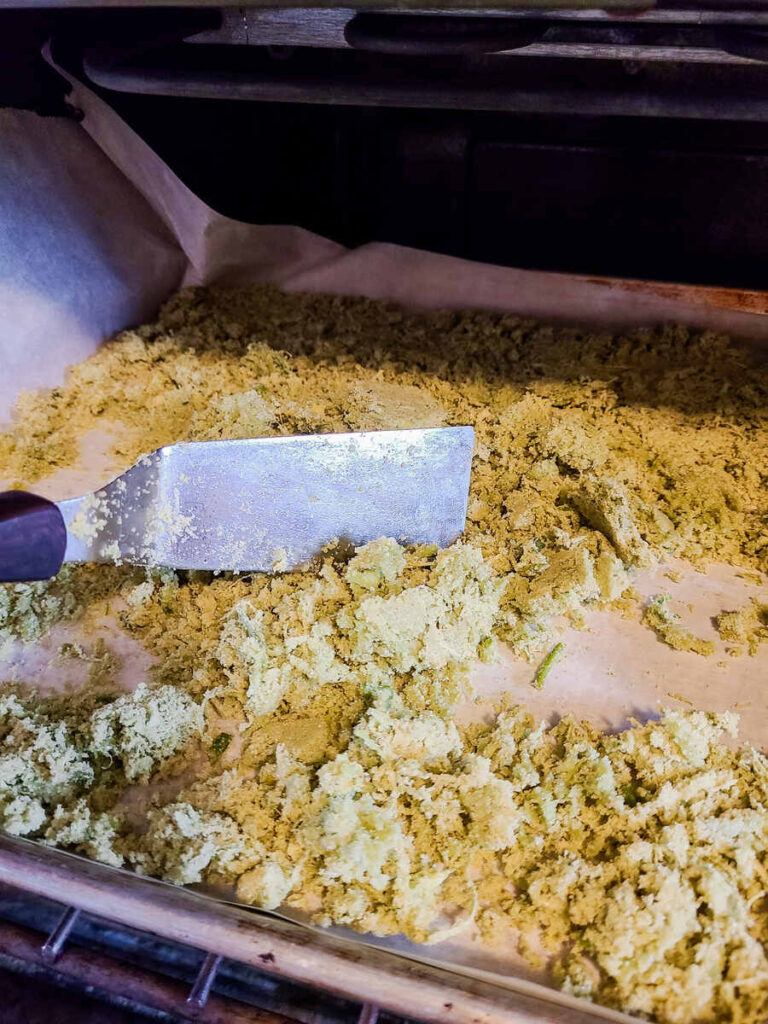
Can you use a dehydrator to make this salt? Yes! Just set at the 200 degree setting, stir occasionally, and remove when fully dry. Continue recipe as usual. If you use a dehydrator, your salt will remain very green. Using the oven lightens the green color and adds a brownish tone.
Don’t use hard pieces of the scape: If there are any hard stem pieces discard those from this recipe otherwise they won’t blend with the rest of the ingredients and work your machine too hard.
Tools You’ll NEed:
Knife
Cutting board
Strainer or colander
Baking sheet
Parchment paper
Food processor/Blender (food processor works better)
Cup measurement
Ingredients:
Fresh garlic scapes
Salt (I use Redmond’s)
How To Make Garlic Scape Salt:
Gather garlic scapes from garden or buy from farmers market/grocery store
Preheat oven to 200 degrees
Rinse any dust/dirt off of the garlic scapes
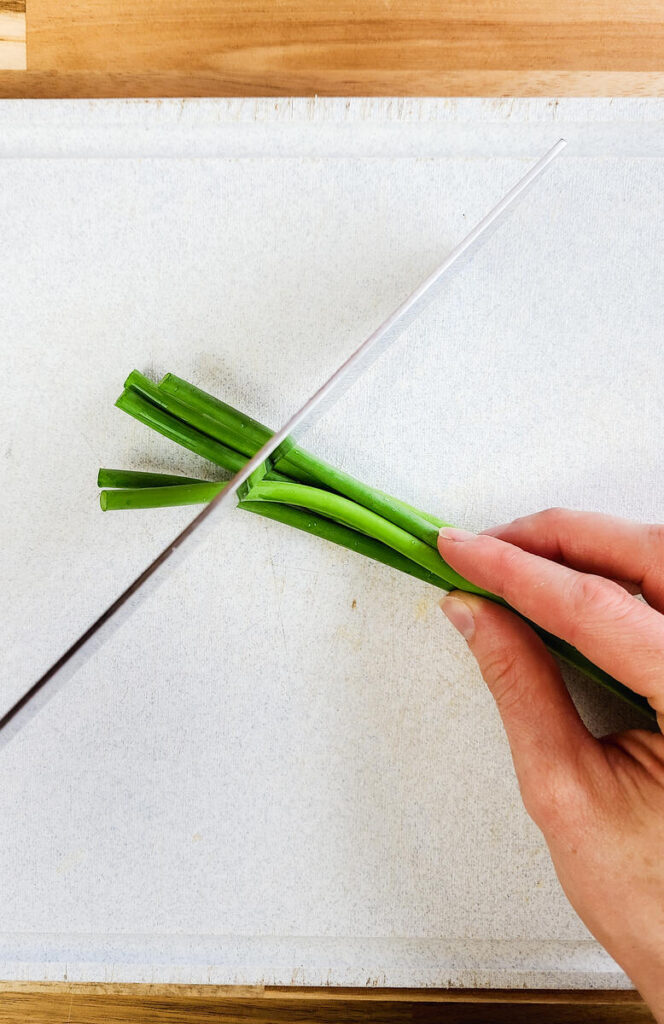
Cut into 1 inch pieces using a sharp knife. Discard any woody ends that may not pulse in the food processor.
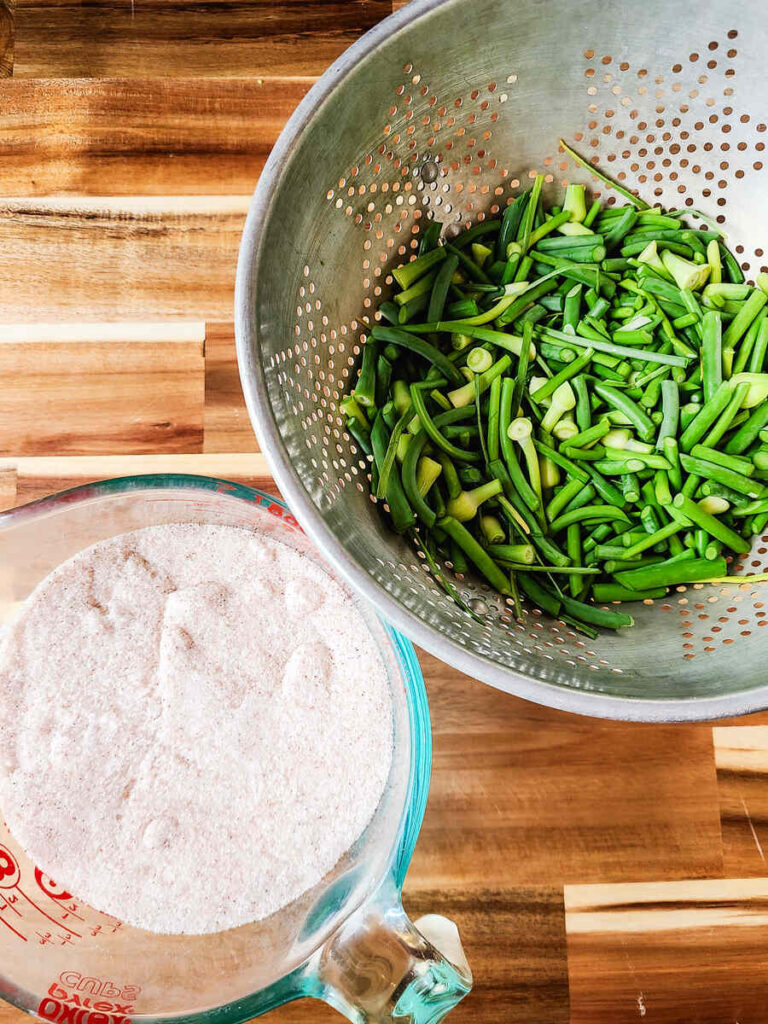
For measurements, use a 2:1 ratio of salt to scapes. For this recipe I used 2 cups of salt to 1 cup of scapes.
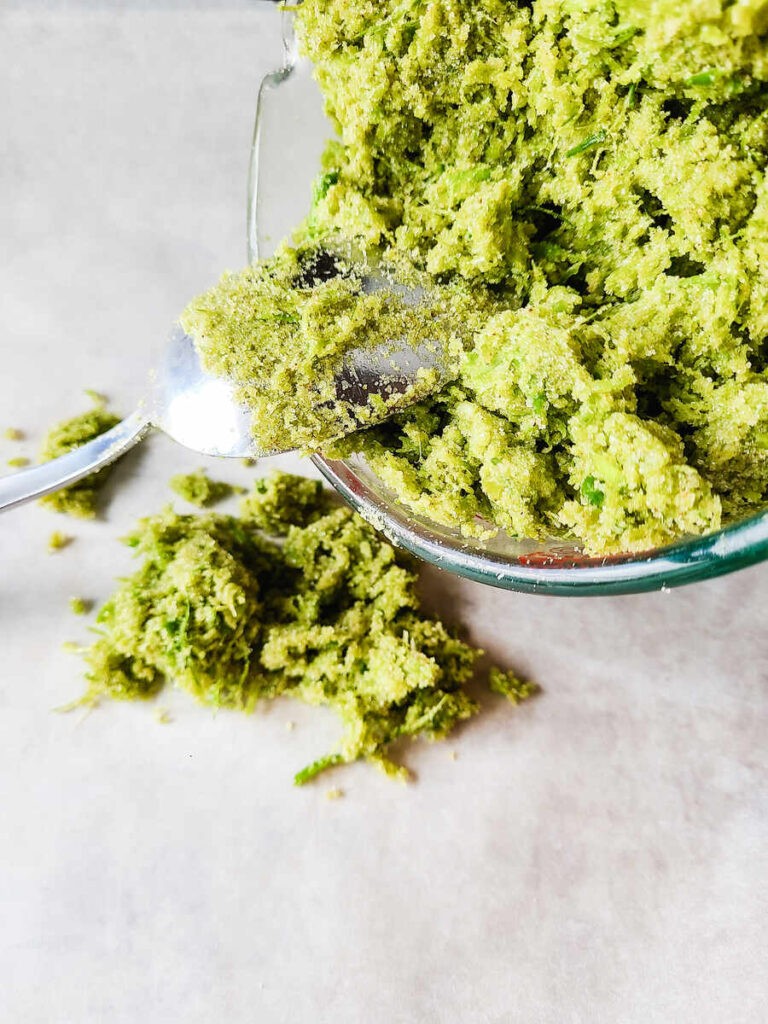
Add the salt and garlic scapes to your food processor/blender
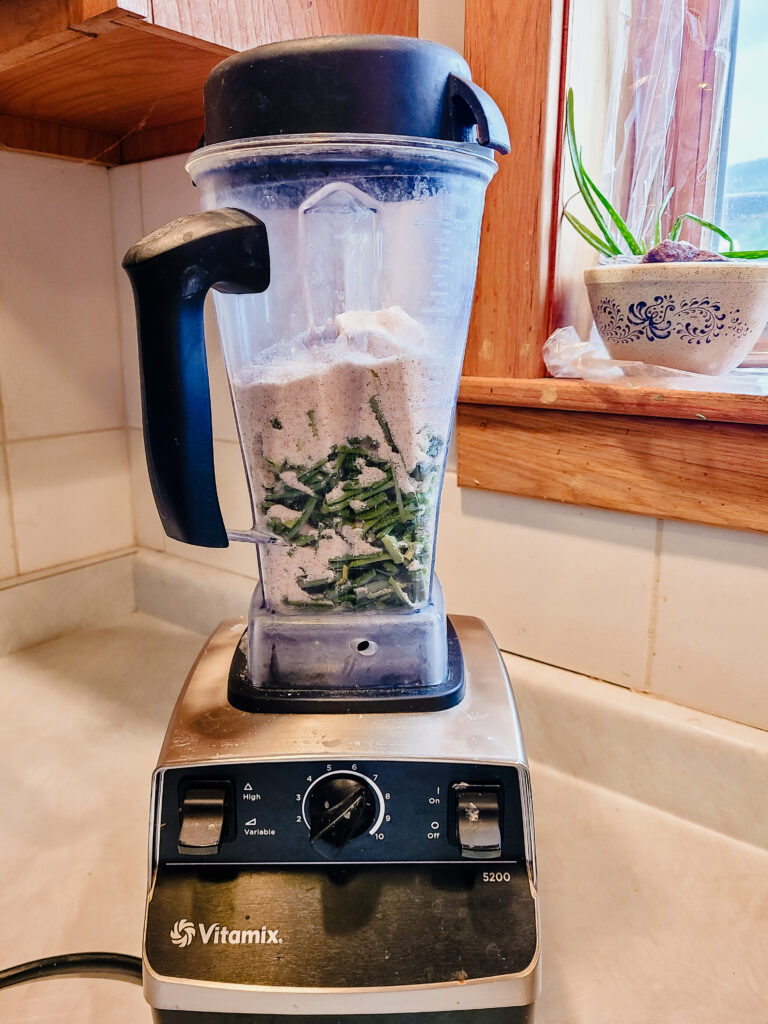
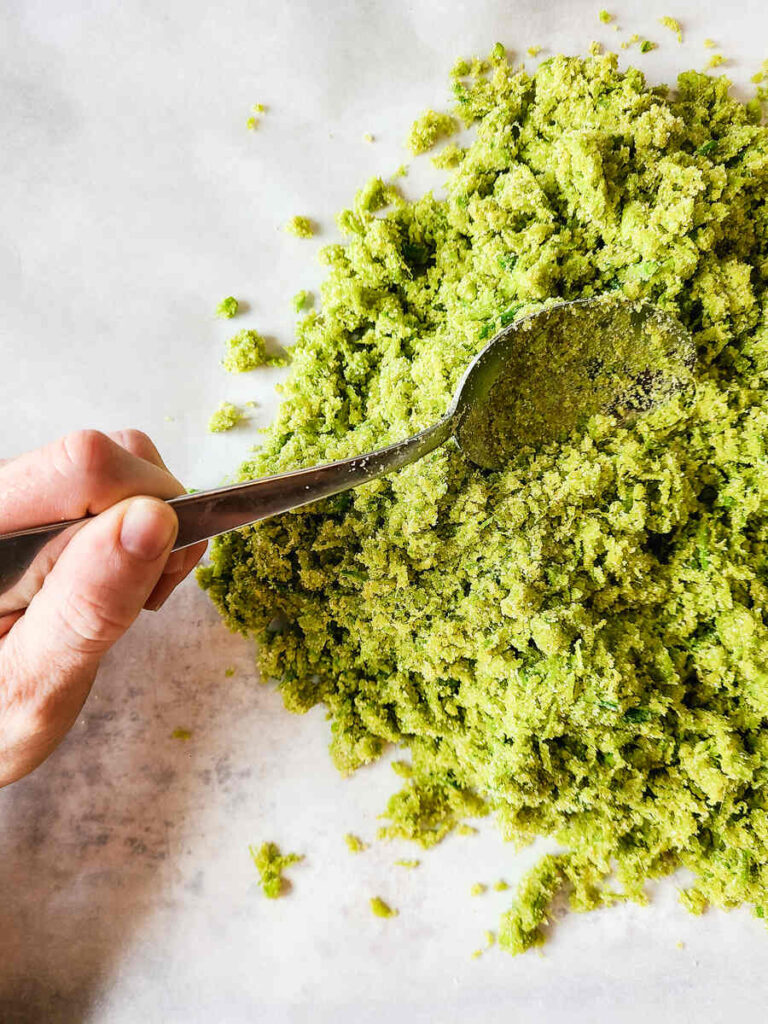
Blend slowly on low and increase speed to high until salt is bright green, and all of the scapes and salt are thoroughly blended.
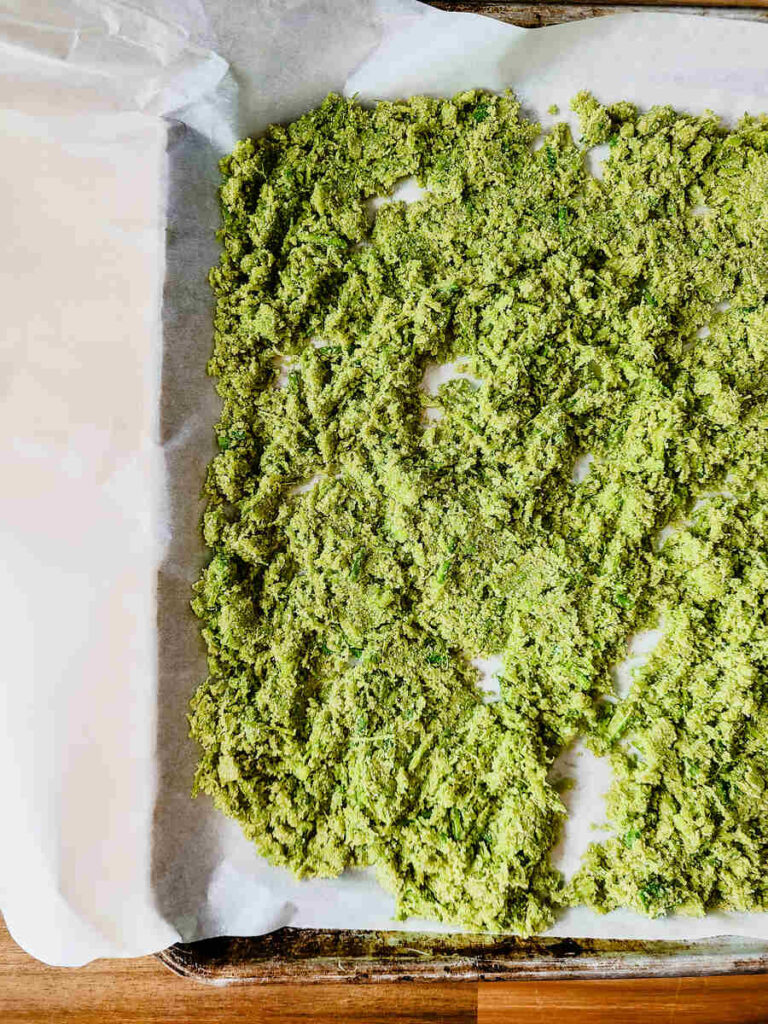
Spread salt onto a parchment lined baking sheet.
Bake at 200 degrees for 1 hour stirring every 15 minutes until crusty and completely dry.
Once fully dry, set aside and allow the salt to fully cool.
If desired, return the garlic scape salt to the cleaned and dried food processor to blend one last time and break up any chunks. If you’d like bigger pieces, simply break apart using a spoon or your fingers.
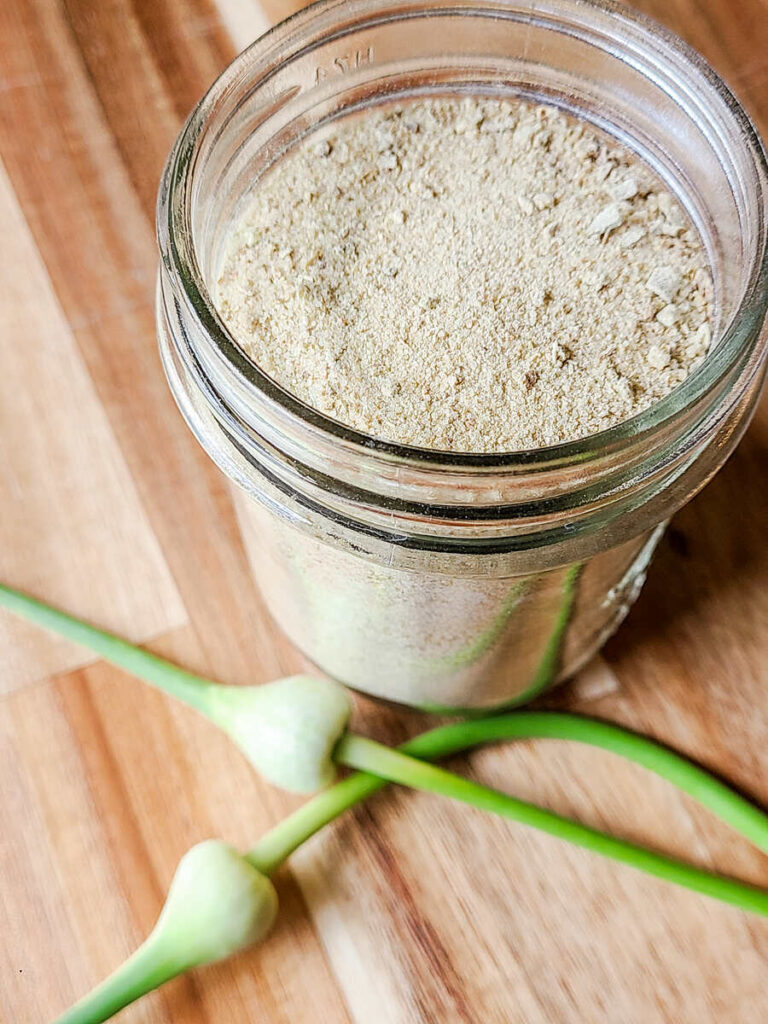
Place your garlic scape salt in a glass airtight container to use and store.
Storage tips: Store in a cool, dry place. This salt will last a very long time, although potency may fade the older the salt gets.
Simple Garlic Scape Salt Recipe
Equipment
- Knife
- Cutting board
- Strainer or colander
- Baking sheet
- Parchment paper
- Food processor/Blender (food processor works better)
- Cup measurement
Ingredients
- Fresh garlic scapes
- Salt I use Redmond’s
Instructions
- Preheat oven to 200 degrees
- Rinse any dust/dirt off of the garlic scapes
- Cut into 1 inch pieces using a sharp knife. Discard any woody ends that may not pulse in the food processor.
- For measurements, use a 2:1 ratio of salt to scapes. For this recipe I used 2 cups of salt to 1 cup of scapes.
- Add the salt and garlic scapes to your food processor/blender
- Blend slowly on low and increase speed to high until salt is bright green, and all of the scapes and salt are thoroughly blended.
- Spread salt onto a parchment lined baking sheet.
- Bake at 200 degrees for 1 hour stirring every 15 minutes until crusty and completely dry.
- Once fully dry, set aside and allow the salt to fully cool.
- If desired, return the garlic scape salt to the cleaned and dried food processor to blend one last time and break up any chunks. If you’d like bigger pieces, simply break apart using a spoon or your fingers.
- Place your garlic scape salt in a glass airtight container to use and store.
- Storage tips: Store in a cool, dry place. This salt will last a very long time, although potency may fade the older the salt gets.
Notes
Did You Try This Simple Garlic Scape Salt Recipe?
I would appreciate it if you would come back and let me know how it went for you!
Want to know more about me? Find my story here:
This post contains affiliate links, which means I make a small commission at no extra cost to you. Please read my full disclosure policy here.